What started out a one Special Forces 'camp' in the Central Highlands of South Vietnam (I Corps) grew into a group of ten (or eleven) "A-teams" in fortified encampments placed at strategic points in the I Corps Operational Area (AO).
A-Teams in I Corps

A-109 and A-103...
Thuong Duc lay west and slightly south of Da Nang, while Gia Vuc is located at the extreme southern end of I Corps. (Both locations are highlighted on the map.) Notice that the region called Annam Highlands encompasses the left-third of the map. This is the area I refer to as the 'high plateau'. Approximately half-way between Gia Vuc and Thuong Duc is Ngoc Linh. At 8500+ feet above sea level it is one of the highest points in Viet Nam.Sorry... I got a little distracted there. Back to the subject of A-Team camps.
In order to gather this intelligence they positioned our camps at remote sites near strategic travelways. (Like A Shau Valley) The only way in or out of these camps was by air. Many times the choppers would leave Da Nang and stop at several camps, dropping off men, mail, and small supplies. The stops at other camps provided a quick opportunity to snap one or two photos of these camps. Therefore, I present my quick photos of Special Forces camps A-107, A-104, and A-108.
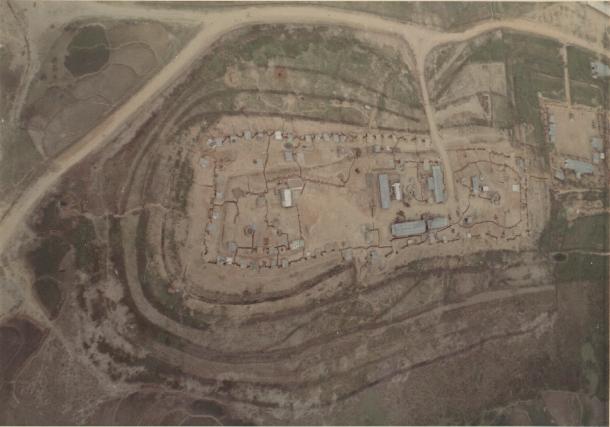
A-104 Ha Thanh
Don't get airsick as we spiral in over the camp!
Pop quiz!
Why would the chopper come in high over the camp and spiral down to land?
To avoid 'ground fire'
-- VC shooting at the chopper from the ground!
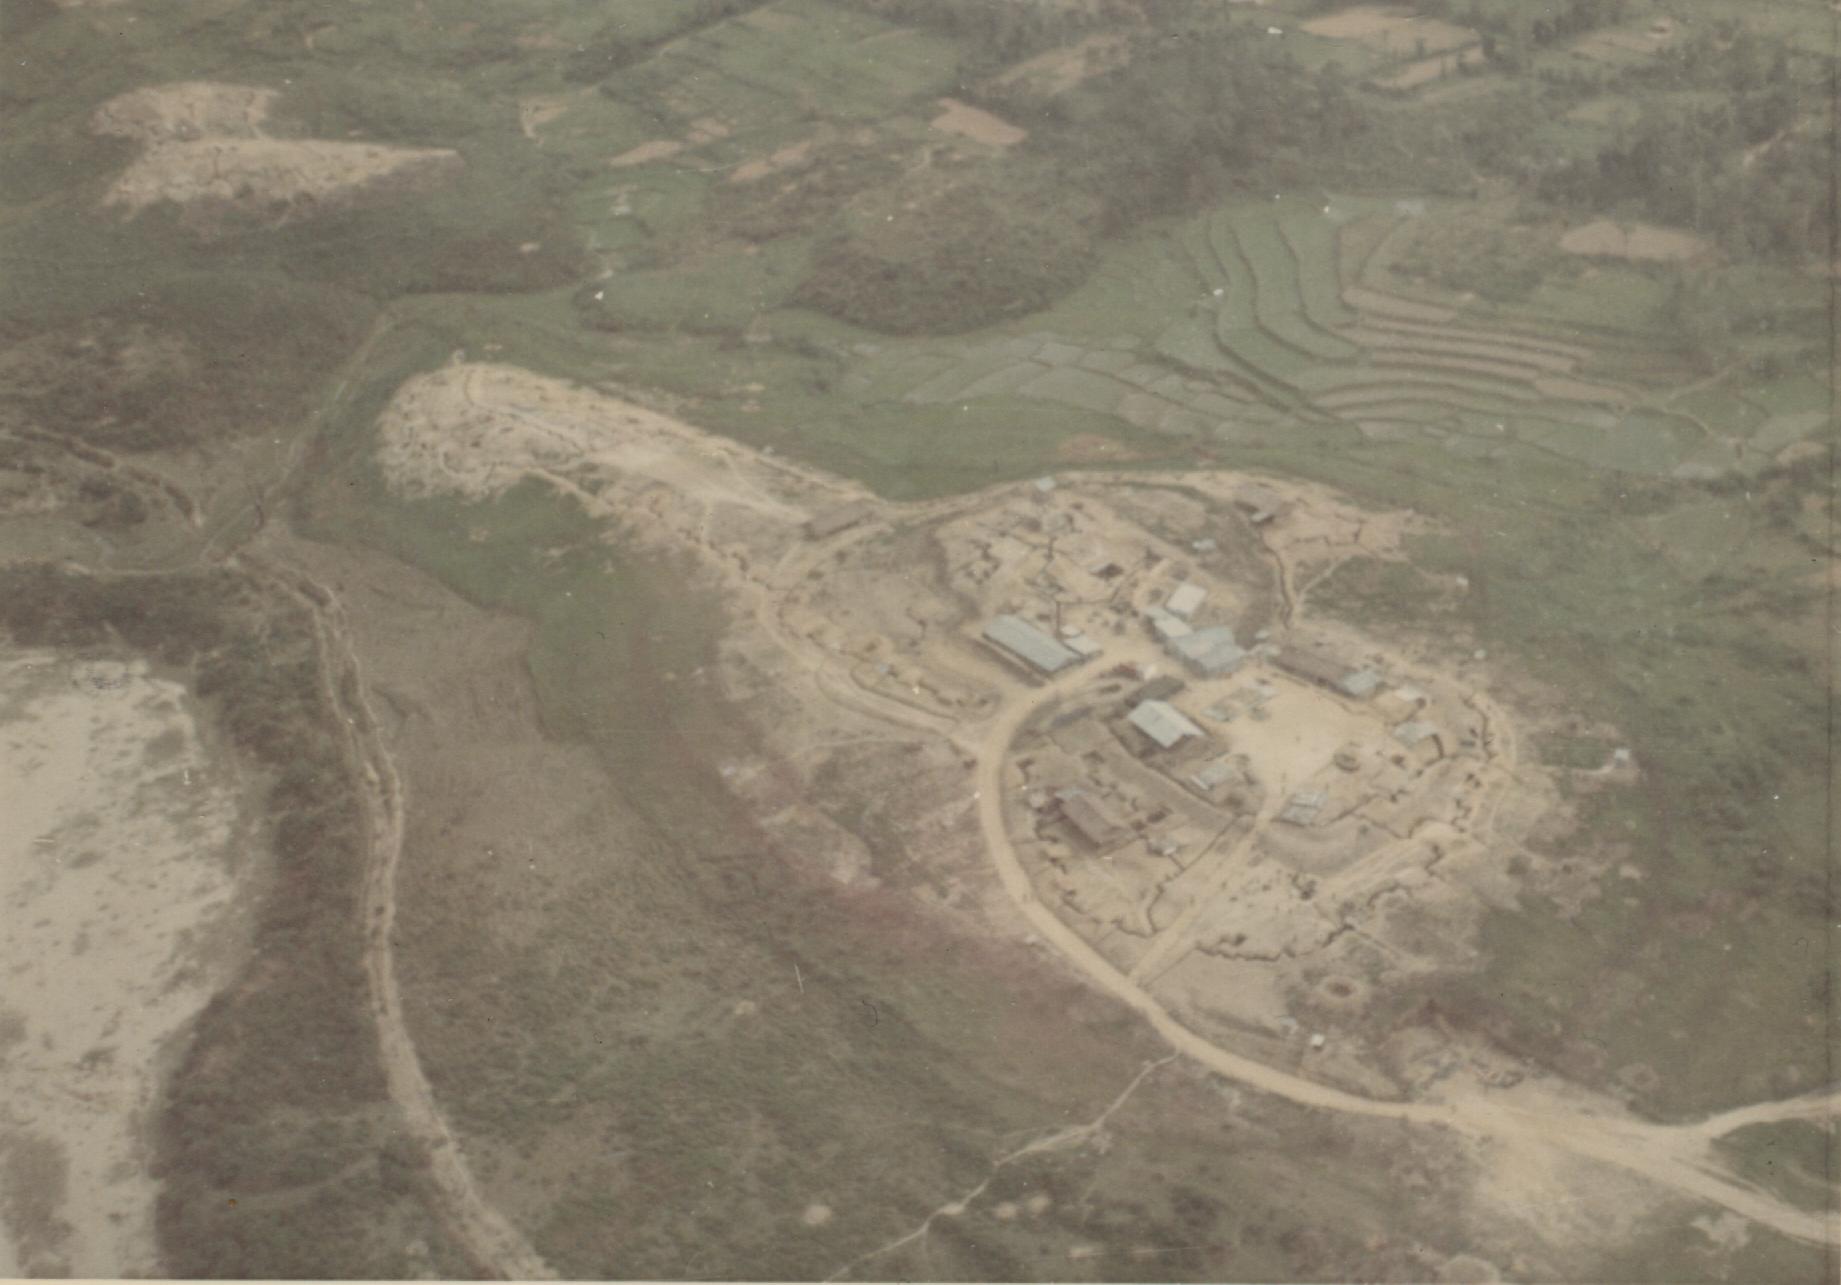
A-107 Tra Bong
Camp A-107 was located almost due north of Gia Vuc. (See map above)
In typical SF fashion it was basically a camp within a camp.
Notice the system of trenches to allow protected travel between locations in the camp.
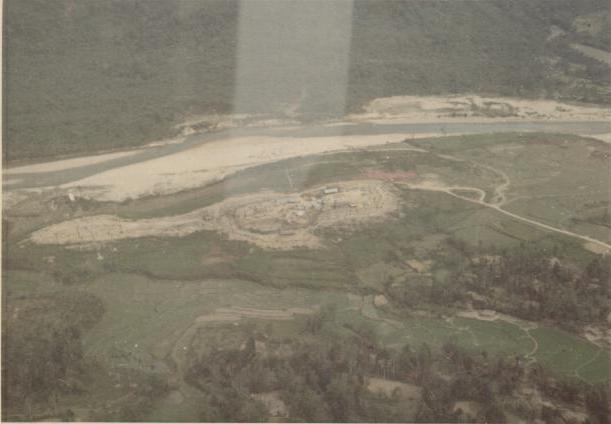
A-107 Tra Bong
A more oblique view of Special Forces camp A-107. Notice the proximity to the river.
Team members 'popped smoke' for the in-bound chopper. (Reddish area right of center)
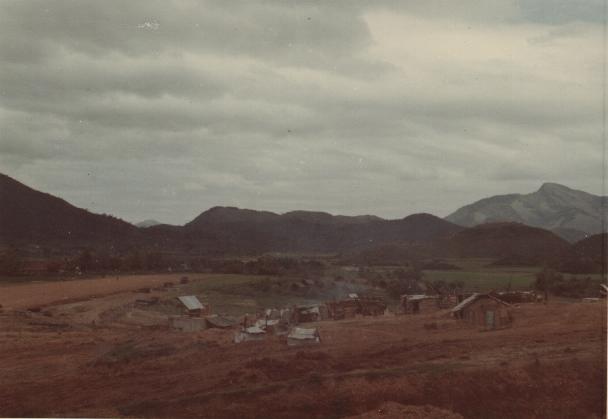
A-108 Minh Long
Looks like the early days at A-108, although I do not remember the camp as 'being built' during this timeframe.
The photo may have been taken at a less-than-optimum angle. It does look like the air strip is just being built and I do not see any 'mature' fortifications in the photo.
Notice surrounding terrain.


